
After testing the rough concept out in clay, I decided to move into 3D-modeling. I was learning Rhino as I went, so the modeling was a bit rocky, but the basic design was faithfully translated into 3D:
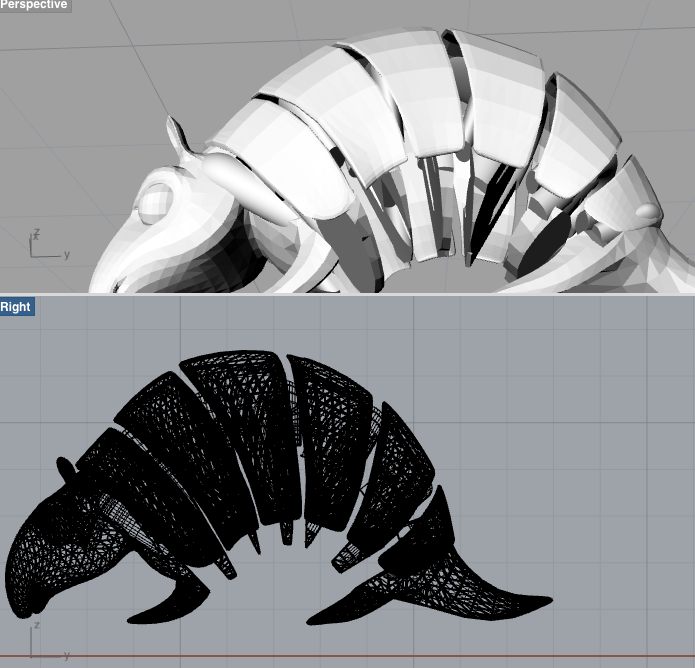
I left space between the body slices to allow it space to curl up– I can fill this space with foam to give visual continuity while maintaining the give.
Each shell piece has a ‘rib’ sticking down from it, with a hole to go along the spine


The messy body pieces are the result of cutting off the top of the (non-shell) body, slicing the remaining body into sections (arranged like the sections of shell, but on the bottom) and adding a ‘rib’ to each section. To fill out the shell a bit, I added a thick curved piping over each rib– basically a replacement ‘body’—
Once these pieces print out, I will skewer them all in order over the ‘spine’ flexible rod, and hopefully it will stay together and roll/unroll cleanly!
After rushing to submit this model to LaGuardia, I took some time to adapt the 3D model for a smaller Mojo print.

Same basic design, but without the gaps in the body–Instead everything is snug inside when unrolled, and I might need to switch to a stretchier rod if I want it to still roll up without those bottom gaps.
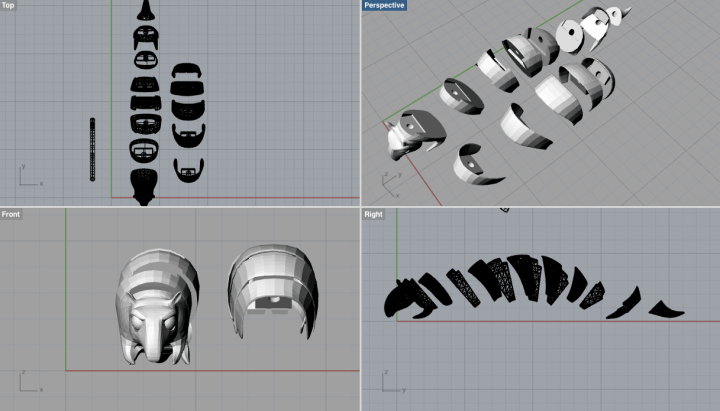
After submitting this for printing, I realized it might not work without the bottom gaps– The idea of filling the gaps with spongy material is probably the best bet, so for the next iteration I will probably cut cleaner gaps, but still use the whole original body cut into slices rather than deleting a bunch of it and then rebuilding a different one inside the shell.
BUT I still haven’t gotten my print back from LaGuardia to truly see how it works, so this is all speculation— But I will find out shortly and go from there…
Categories: Uncategorized
